 Like any construction tool, hanging blueboard takes time and knowledge. It takes a level of professional skill to achieve certain levels of quality when hanging blueboard, but anyone can perform the task with the right tools and knowledge. We’re going to guide you through the process for hanging blueboard today so you can understand the process and attempt it yourself, if you so choose.
Measure, then cut
As with most construction tasks, you need to fit the material you’re working with to your environment. You need to properly measure the location to ensure you don’t under or overcut your blueboard. Once you’re satisfied with your measurements, begin cutting the board.
Each board is 4 feet wide, so whether you cut horizontally or vertically make sure you remember that. Make sure you secure every piece you cut and wear proper safety gear such as eye protection, boots, gloves, and more protective gear. You can space boards and create cross patterns as you see fit based on the space, but we recommend consulting a professional if you aren’t sure where to put the boards.
Installing
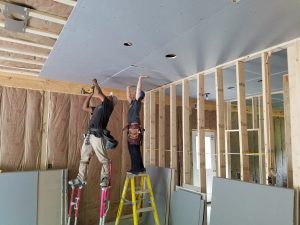
When you get ready to begin installing, start with the ceiling. Make sure you use the proper equipment and safety tools to protect yourself. Use screws to attach the sheets to studs throughout the framework. After this you can begin to work on the walls.
When you’re ready to get started on the walls, make sure you keep the beveled ends flush to ensure a less visible seam and a stronger seal. The same process as the ceiling applies here. Use a lifter tool to raise the wall when attaching the blueboard. This will allow you to push the seams together and ensure you have everything as flush as possible.
Taping
Once everything is installed, you can begin taping. Blueboard has a sticky backing, so you won’t need to use any extra materials like plaster or mud to make it stick to the walls. Just roll off the tape and stick it to the wall in the correct location. Use a utility knife to cut once everything is in the right place. Make sure you push down on each area to create a stronger seal. It should remain completely bubble free, unlike drywall tape.
You’ll be using the tape to secure the joints throughout. Make sure you cut carefully and smooth everything out to avoid any loose spots.
Plaster
This is the trickiest part of the entire process. When using plaster you have the option to create several types of finishes or utilize the plaster in creative ways. We typically recommend working with a professional when it comes to creating unique textures
To plaster your blueboard, apply veneer plaster to the walls after you have mixed the plaster according to its directions and recommended consistency. Begin by applying a small bit of plaster to the mortar board, then take a thin layer and spread it out over the taping. Move quickly, as this veneer plaster will dry before you know it. Add some water if it dries out.
After you’ve plastered all the tape, apply a thin, even layer of plaster on the walls, starting from the top. Go slowly and carefully to avoid clumping or making it too thick. Work your way to the bottom of the wall, then go back to the top. Keep doing this until you’ve covered all the areas.
If you would like to create a custom finish you will need to create the pattern while the plaster is still wet, so make sure you incorporate that as you go.
Finish!
That is the entire process for hanging blueboard and finishing the wall. While there isn’t a great amount of in-depth detail, this should give you a good idea of the process and what to expect. If you’re unsure about tackling this yourself, contact a professional at Twin City Blueboard and we’ll be sure to give you a finish you’ll love.